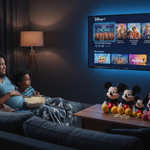
A good movie night doesn’t require a dedicated cinema room, surround-sound speakers, or a television mounted on the wall. Even in a modest rental, the right equipment can turn an ordinary living room into a comfortable home theater. The challenge is creating a setup that can be dismantled without damaging the apartment when it is time to move.
A renter-friendly home theater should rely on portable equipment and avoid permanent modifications wherever possible. A television or projector provides the picture, a soundbar improves the audio, and a streaming device gives you access to your favorite shows and movies. Small additions, such as blackout curtains and cable management accessories, can complete the setup.
Here’s how to assemble a simple home theater that fits your space, budget, and rental restrictions.
Start With the Space, Not the Equipment
Before buying anything, consider the limitations of the room. The setup should allow everyone to see the screen comfortably, whether it is placed in a living room corner, bedroom, or small den.
Pay attention to the natural light at the time you usually watch television. If sunlight falls directly on the screen, you may need to rearrange the furniture or add suitable window coverings. In a shared living space, make sure the equipment does not block walkways or interfere with other residents.
Measure the room and consider the distance between the screen and your usual seating position. Check where the electrical outlets are located, too, since their positions can influence where the television or media console should go.
These measurements can help you select an appropriate screen size, determine the length of HDMI cables you need, and avoid buying equipment that overwhelms the room.
There is no need to purchase everything at once. Start with the display, arrange the space around it, and add other components as needed.
Choose Your Screen: Television or Projector?
The display is the foundation of a home theater, but the right choice depends on the room, viewing habits, and budget.
A television for everyday use
A television is usually the most straightforward option for a rental home. It can serve as a movie screen, gaming display, and everyday television without requiring additional equipment.
If you already own a suitable TV, you can skip the display upgrade and focus on improving the audio or streaming experience. If you need a new one, choose a size that fits the room and the available furniture.
A media console or freestanding TV stand lets you avoid drilling holes into the wall while keeping the equipment easy to move.
Explore TV stands and media consoles on Amazon.com
A projector for a larger image
A projector can create a more cinematic experience, especially if you enjoy watching movies on a large screen. Compact models can often sit on a table or shelf without permanent installation.
However, projectors have limitations. The image size depends on the throw distance, while brightness and ambient light affect how clearly the picture appears. A plain, light-colored wall may work for casual viewing, but a proper projector screen can provide a more consistent surface.
Before buying, check the resolution, brightness specifications, throw distance, available video inputs, and streaming options. A product’s advertised maximum screen size does not necessarily mean it will deliver a clear picture in every room.
Browse home theater projectors on Amazon.com
For renters, a portable projector paired with a freestanding screen can be a flexible alternative to a permanently mounted display. Just make sure you have enough space and can control the lighting.
Complete the Setup With a Soundbar
Television speakers can struggle to reproduce clear dialogue, particularly during movies with quiet conversations and loud action scenes. A soundbar can improve the listening experience without taking up as much room as a full surround-sound system.
Most soundbars can sit directly on a media console, eliminating the need for wall brackets.
Explore soundbars for home theaters on Amazon.com
When comparing models, pay attention to these features:
- Dialogue enhancement: Look for models with voice-enhancement settings that make conversations easier to understand at moderate volumes.
- Audio connections: Check whether the soundbar supports HDMI ARC or eARC, optical audio, or the connection available on your television.
- Subwoofer: Some models include a separate subwoofer for deeper bass. Make sure you have enough space for it.
- Night mode: A night mode can reduce loud sound peaks and make late-night viewing more considerate of neighbors.
- Size: Measure the available console space and make sure the soundbar does not block the TV screen or remote-control sensor.
You do not need multiple speakers to get started. A suitable soundbar can improve dialogue and make movies more enjoyable without complicating the room.
Add Streaming Without Complicating the Setup
If your television already supports the streaming services you use, there may be no need to purchase an additional device. Otherwise, a streaming stick or compact streaming box can add compatible applications to your entertainment setup.
These devices typically connect to an HDMI port on the television or projector. Depending on the model, they may receive power through USB or a separate power adapter.
Find streaming devices for home theaters on Amazon.com
Before ordering, confirm that the device supports your display’s resolution, the applications you want, and your home’s Wi-Fi connection. Some streaming platforms require separate paid subscriptions.
A streaming device can be more convenient than connecting a laptop every time you want to watch a movie. However, if you already own a gaming console or another device that supports your favorite streaming applications, using that may be the more economical choice.
Make Sure the Setup Is Comfortable
The viewing experience depends on more than the screen and speakers. Furniture placement, lighting, and the arrangement of equipment can make a significant difference.
Position your main seat so the screen is easy to see without forcing you to tilt your head uncomfortably. Leave enough space around the media console for people to walk past safely.
If you’re using a projector, make sure its distance from the screen is appropriate and that it sits on a stable surface. Avoid placing it where people might accidentally knock it over.
Consider how sound may travel into neighboring apartments, especially if the sofa is close to a shared wall. Rugs, curtains, and upholstered furniture can soften sound reflections within the room, although they will not soundproof the walls.
You don’t need dedicated cinema seating to create a comfortable environment. An existing sofa or armchair can work perfectly well when positioned properly.
Control Light Without Changing the Room
Ambient light affects both television viewing and projector performance. If the room has large windows, check whether the existing blinds or curtains already provide enough control before buying anything new.
When additional window coverings are needed, removable options may be more suitable for a rental than fixtures that require screws. Tension rods can be useful in compatible window openings, provided they fit securely.
Browse blackout curtains on Amazon.com
Find tension curtain rods on Amazon.com
A television does not necessarily require a completely dark room. Soft ambient lighting from a lamp positioned away from the screen may make viewing more comfortable.
Projectors generally benefit more from reduced ambient light. If you cannot darken the room enough to produce a satisfying picture, a television may be the more practical option.
Keep Cables Under Control Without Drilling
Loose power cords and HDMI cables can make an entertainment area look untidy and create trip hazards. Fortunately, there are several ways to manage cables without cutting into walls or installing permanent channels.
Start by positioning your equipment near existing outlets. Use cables of appropriate lengths rather than leaving excess wire bundled behind the television.
A few simple accessories can help:
- Cable clips: Guide individual wires along the back of a desk or media console.
- Cable sleeves: Group several cables into a single bundle.
- Cable management boxes: Conceal compatible power strips and excess cable length.
- Reusable cable ties: Keep wires organized while making equipment easier to disconnect when moving.
Shop cable management accessories on Amazon.com
Explore cable management boxes for TVs on Amazon.com
Keep ventilation openings clear, especially around equipment that produces heat. Use power strips according to their ratings and instructions, and never overload electrical outlets. Removable cable ties are particularly useful if you expect to disconnect and reconnect the equipment several times.
Improve the Sound Without Disturbing Neighbors
A home theater should be enjoyable without creating unnecessary noise for other residents. This is especially important in apartments with shared walls or floors.
Use dialogue enhancement or night mode when available, so conversations remain understandable without increasing the overall volume. You can also consider wireless headphones for late-night viewing.
Explore wireless headphones for TV watching on Amazon.com
Before purchasing headphones, check whether your television supports Bluetooth audio and whether the connection introduces noticeable delays. Some TVs also limit which audio outputs can be used simultaneously, so verify compatibility if you want to use headphones alongside a soundbar.
If your soundbar includes a subwoofer, place it where vibrations are less likely to travel through shared walls or floors. Keep bass levels reasonable, particularly during quiet hours.
A more expensive audio system will not necessarily provide a better experience if you cannot use it at a comfortable volume.
Build Your Home Theater in Stages
A home theater does not have to be purchased as a complete package. Building it gradually lets you prioritize the equipment that makes the biggest difference.
The essentials
Start with a suitable television or projector, a stable surface, and the cables needed to connect your equipment. Add a soundbar if the built-in speakers are not satisfactory, and organize the wires to keep the area tidy.
If your television already supports the streaming services you use, you may not need a separate streaming device.
The movie-night upgrade
If you want a more convenient viewing experience, add a streaming stick, improve the room’s lighting, or rearrange the seating. A projector and freestanding screen may be worth considering if you want a larger image and can control ambient light.
You could also add blackout curtains if the existing window coverings are not sufficient.
The more immersive setup
If your room and budget allow, consider a soundbar with a subwoofer, a larger display, or a projector with a suitable screen. Wireless headphones can provide a more private listening option.
Choose upgrades based on what your current setup lacks. If the picture is good but dialogue is difficult to hear, prioritize audio. If the image feels too small, consider a larger TV or projector.
Prices and features vary between products, so compare the overall value of the complete setup instead of focusing only on the cost of one component.
Mistakes to Avoid When Setting Up a Home Theater in a Rental
A few common mistakes can lead to unnecessary spending or make the equipment harder to use.
Buying a projector without checking the room: A projector may perform poorly in bright surroundings or if the available throw distance is insufficient.
Mounting everything permanently: Wall brackets and ceiling mounts may conflict with rental rules. A media console, tabletop projector, or freestanding screen can offer more flexibility.
Ignoring connectivity: Check HDMI ports, audio outputs, Wi-Fi requirements, and power connections before purchasing additional devices.
Forgetting subscription costs: Streaming services and some premium features may require separate recurring payments.
Buying too many speakers immediately: A soundbar may be sufficient for a small room. A larger system occupies more space and may be difficult to use at a considerate volume.
Leaving cables across walkways: Organize cords so they do not create tripping hazards or interfere with furniture placement.
Overlooking moving day: Keep accessories, remote controls, adapters, and original packaging together where practical. Remove mounted accessories carefully and follow your lease requirements.
Frequently Asked Questions
Can I build a home theater in a rental without drilling holes?
Yes. A television on a stand, tabletop projector, soundbar, streaming device, and removable cable organizers can form a useful setup without drilling. Check your lease before attaching anything to walls, windows, doors, or other surfaces.
Is a projector better than a TV for a renter?
It depends on the room. A television generally performs more consistently in bright surroundings and is convenient for everyday viewing. A projector can provide a larger image when there is sufficient distance and the room can be darkened.
What is the most important home theater upgrade?
If you already have a suitable television, a soundbar is a practical first upgrade. If the display is too small or unsuitable for your room, improving the picture may be a better investment.
Do I need a special screen for a projector?
Not necessarily. A smooth, light-colored wall can work for casual viewing, but a proper projector screen offers a more consistent surface. A freestanding screen can be useful when permanent mounting is not permitted.
How can I watch movies without disturbing my neighbors?
Keep the volume moderate, enable dialogue enhancement or night mode if available, and consider compatible headphones for late-night viewing. Avoid excessive bass because vibrations can travel through shared walls and floors.
Can I take my home theater setup when I move?
Most portable equipment, including televisions, soundbars, streaming devices, projectors, and headphones, can be packed and reused. Keep accessories together and remove any mounted items carefully in accordance with the manufacturer’s instructions and your lease.
Final Thoughts
Building a simple home theater as a renter is about selecting equipment that suits your space and viewing habits without making permanent changes. A television or projector provides the picture, a soundbar can improve the audio, and a streaming device makes it easier to access your favorite entertainment.
Start with the equipment you already own and invest in upgrades only where they make a noticeable difference. With thoughtful placement, organized cables, and suitable lighting, you can enjoy movie nights at home while keeping your setup flexible enough to take with you when you move.
Amazon Affiliate Disclosure: As an Amazon Associate, I earn from qualifying purchases. If you click on an Amazon.com link in this article and make a purchase, I may earn a commission at no additional cost to you.