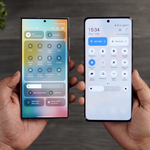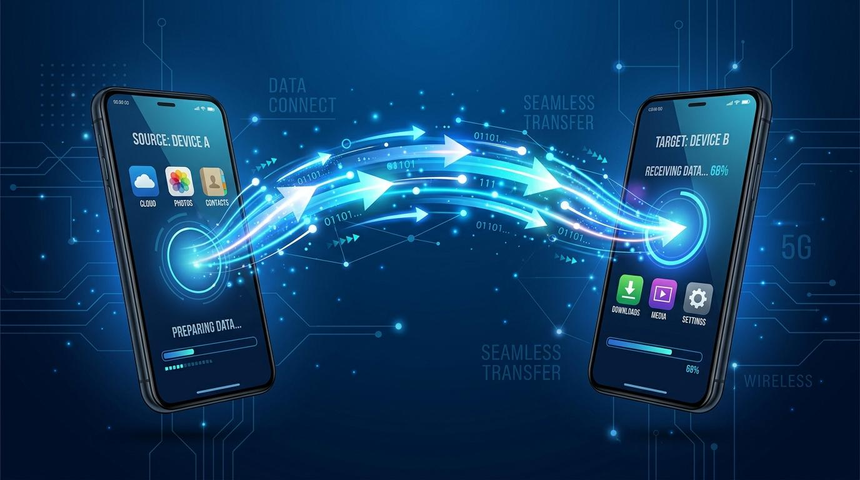
As exciting as getting a new phone is, it can also be intimidating to think about everything that lives on the old one. Photos, contacts, passwords, banking apps, downloaded files, and years’ worth of conversations all risk being lost during the transition.
Fortunately, most of that information does not need to be transferred manually. Android and iPhone both provide tools to move supported information during the initial setup process. The steps depend largely on which phone you are replacing and which one you are buying.
Before you begin, prepare your old phone, choose an appropriate transfer method, and verify that your important information has arrived before erasing the original device.
Before You Start: Prepare Your Old Phone
A little preparation can make migrating information from an old phone to a new one much easier. Before powering on your new phone for the first time, follow these steps.
1. Back Up Important Information
Create a fresh backup of your old phone’s data before beginning the migration process.
- For iPhone: Check your iCloud backup settings or create a backup using a compatible computer.
- For Android: Review the backup settings associated with your Google Account.
A backup is not the same as a complete transfer, but it can help recover information if the migration encounters an error. Apps, downloaded content, and account information may require separate attention.
2. Check Your Photos and Videos
Open your photo gallery and confirm that your most recent images and videos are available. If you use Google Photos, iCloud Photos, or another photo storage service, check that your online library or device backup is up to date.
Do not assume that every image is backed up simply because the relevant app is installed. Some files may exist only on your old device.
For particularly important photos and videos, consider making a second copy on a computer or portable external drive. The Samsung T7 Shield Portable SSD on Amazon.com is one option to consider. Check the connection requirements and compatibility with your phone or computer before purchasing.
3. Make Sure You Know Your Account Passwords
You will likely need your Apple Account or Google Account credentials during setup. You may also need to verify your identity through a trusted device, phone number, or another authentication method.
Make sure you can access your email accounts and password manager before moving forward. If your authentication app stores codes locally, check how to transfer or recover those codes before wiping the old phone.
4. Update Both Phones and Charge Them
Install available updates if practical, charge both devices, and connect them to a reliable Wi-Fi network.
A cable can make some transfers easier, although wireless options are also available on many phones.
For compatible USB-C devices, the Anker USB-C to USB-C Data Cable on Amazon.com is one option to consider. Confirm that the particular cable supports data transfer rather than charging only.
For older iPhones with a Lightning port, the Apple USB-C to Lightning Cable on Amazon.com may be suitable for compatible devices. Check the ports on both devices and the transfer method you plan to use before ordering.
5. Check Your SIM or eSIM
Physical SIM cards can often be moved from one phone to another, provided they fit the receiving phone and are supported by your carrier.
An eSIM may need to be transferred using the phone’s setup tools, a carrier application, or assistance from your carrier. Avoid deleting the eSIM from your old phone until you understand how your carrier handles the transfer.
Moving From Android to Android
Moving from one Android phone to another is usually straightforward because both devices may support Google’s built-in data-copying process.
Depending on the devices and backup settings, Google’s transfer tools can copy contacts, messages, call history, photos, videos, and some device settings. The exact information transferred varies by phone and configuration.
How to Transfer Your Data
- Turn on your new Android phone and begin the setup process.
- Connect to Wi-Fi when prompted.
- Select the option to copy apps and data from your old device.
- Connect the two phones using a compatible data cable, if supported, or follow the wireless instructions.
- Sign in to your Google Account when prompted.
- Select the information you want to copy and begin the transfer.
- Keep both devices powered on until the process is complete.
If you have already set up the new phone, some transfer options may require you to restart the setup process. Check your manufacturer’s instructions before resetting anything.
What About Samsung Smart Switch?
If you are transferring to a supported Samsung Galaxy phone, Samsung Smart Switch offers another way to migrate information. Depending on the devices and transfer method, it can move contacts, photos, videos, messages, and other supported content.
Some app data, account information, and application-specific settings may not transfer.
For more information, visit the official Samsung Smart Switch page.
Moving From iPhone to iPhone
Apple offers a migration process called Quick Start that lets you transfer information from one iPhone to another. You can also restore your new device from an iCloud backup.
Option 1: Use Quick Start
Quick Start is convenient when both iPhones are available.
- Turn on your new iPhone and place it near your old one.
- Make sure Wi-Fi and Bluetooth are enabled on the old iPhone.
- Follow the Quick Start prompt that appears on the old device.
- Follow the instructions to authenticate and configure your new iPhone.
- Choose the available transfer option and keep both devices powered on and nearby.
- Wait for the transfer and setup process to finish.
Depending on your connection and the amount of information being transferred, the process can take some time.
Option 2: Restore From iCloud
If you prefer not to transfer directly between devices, you can restore an iCloud backup during the new iPhone’s setup process.
Select the appropriate backup and keep the new phone connected to Wi-Fi and power. Some applications and content may continue downloading after the initial setup is complete.
For detailed instructions, consult Apple’s official iPhone transfer guide.
Switching From Android to iPhone
Switching operating systems requires additional preparation because Android and iOS handle some applications and content differently.
Apple’s Move to iOS app is designed to transfer supported information from an Android phone to a new iPhone during the initial setup process.
How to Use Move to iOS
- Turn on your new iPhone and begin setup.
- Select the option to transfer data from Android when it appears.
- On your Android phone, open Apple’s Move to iOS app and follow the instructions.
- Enter the code displayed on your iPhone when prompted.
- Select the information you want to transfer.
- Leave both devices undisturbed until the transfer finishes.
Keep both devices connected to power if the transfer takes a long time. Avoid using the Android phone for other tasks during the process.
Some applications may need to be reinstalled or configured separately. Music libraries, PDFs, authentication tokens, and certain account details may not transfer automatically.
If you have already completed the iPhone setup, you may need to erase the new device to use the standard migration process. Back up anything already stored on it before doing so.
Switching From iPhone to Android
Moving from an iPhone to Android also requires some preparation. The exact steps depend on your new device, but many Android phones provide a transfer option through USB, Wi-Fi, or both during setup.
How to Transfer Your Information
- Start setting up your new Android phone.
- Choose the option to copy data from an iPhone or another device.
- Follow the instructions provided for your particular phone.
- If prompted, connect the devices using a compatible data cable or adapter.
- Select the information you want to transfer.
- Sign in to your Google Account and follow the remaining setup instructions.
Many Android phones can import contacts, photos, videos, messages, and calendars. Applications and their data often need to be installed or configured separately. Some information may also be available through cloud services.
If you are switching your phone number to Android, remember to deregister iMessage when appropriate so that messages from Apple users can reach you as regular text messages.
Use Apple’s official iMessage deregistration page for instructions.
What Usually Transfers—and What Needs Extra Attention?
Transferring everything is not always as simple as selecting a few options during setup. Use this checklist to identify information that may require separate attention.
| Type of information | What to check |
|---|---|
| Contacts and calendars | Confirm that your account is synchronized and recent entries are present. |
| Photos and videos | Check recent files and cloud synchronization. |
| Text messages | Open important conversations and verify that the required history is available. |
| WhatsApp and other messaging apps | Follow the app’s official transfer or backup process. |
| Banking and payment apps | Reinstall apps and complete any required authentication steps. |
| Password manager | Sign in and make sure your passwords and passkeys are accessible. |
| Authenticator apps | Transfer or recover accounts before erasing the old phone. |
| Email accounts | Sign in and check that messages, folders, and contacts are available. |
| Music, books, and downloads | Confirm that files are stored locally or can be downloaded again. |
| eSIM and mobile service | Check that calls, texts, and mobile data work on the new phone. |
| Notes and recordings | Check the relevant app or cloud service for the files you need. |
| Work or school apps | Follow your organization’s instructions if the device is managed. |
WhatsApp, Banking Apps, and Authentication Codes
Some of the most important information on your phone is stored within individual applications rather than the phone’s general backup system.
Before switching devices, check WhatsApp’s backup settings on your old phone. Depending on the devices involved, you may need to use WhatsApp’s dedicated migration tools rather than relying on a general phone backup.
If you are switching between Android and iPhone, follow the official WhatsApp transfer instructions for your specific combination of devices.
Do not erase the old phone until you have opened WhatsApp on the new device and confirmed that the conversations and media you need are available.
Banking and Payment Apps
Banking apps may need to be reinstalled or reauthenticated. Some limit the number of registered devices or require additional activation steps.
Make sure you can access the phone number associated with the account or your required authentication method. Never share one-time passwords or verification codes with anyone who requests them, even if they claim to represent your bank.
Authenticator Apps and Passkeys
Authenticator apps can be easy to overlook because some generate codes directly on the phone without synchronizing them to an online account.
Before switching, check the app’s process for exporting or recovering authentication information. If backup codes are available, store them securely.
Passkeys may synchronize through a supported account or password manager, depending on how they were created and stored. Confirm that you can access important accounts on the new phone before erasing the old one.
Do You Need a Computer, Cable, or External Storage?
Migrating information does not always require buying new equipment. The right method depends on your devices and the amount of information you need to move.
Anker USB-C to USB-C Data Cable
A compatible data cable can simplify transfers between supported Android phones and other devices with USB-C ports. Make sure the cable supports data transfer rather than charging alone.
Find Anker USB-C data cables on Amazon.com
Apple USB-C to Lightning Cable
If you have an older iPhone with a Lightning connector and a compatible USB-C device, this cable may be useful for supported wired connections. Some transfers may require a different cable or adapter.
Find the Apple USB-C to Lightning Cable on Amazon.com
Samsung T7 Shield Portable SSD
An external SSD can provide a separate copy of your photos, videos, and documents. The Samsung T7 Shield is one portable storage option to consider.
Check its capacity, connection requirements, file system support, and compatibility with your phone or computer before purchasing.
Find the Samsung T7 Shield Portable SSD on Amazon.com
Kingston XS1000 Portable SSD
The Kingston XS1000 is another portable SSD worth considering for storing copies of important files. Choose a suitable capacity and check whether your phone can connect directly or requires an adapter or computer.
Find the Kingston XS1000 Portable SSD on Amazon.com
A Computer
A computer can help you make additional copies of photos, videos, and documents. Depending on the operating system and available software, it may also be useful for creating device backups or recovering specific files.
Before purchasing an accessory, check what your phone already supports. You may not need any additional equipment for a straightforward transfer.
How to Check That Everything Arrived Safely
Do not judge the success of a transfer by the number of apps visible on the home screen. Take a few minutes to confirm that the information you actually need has arrived.
- Check your contacts and important entries.
- Look through recent photos and older albums.
- Open important message conversations.
- Confirm that your email accounts are working.
- Sign in to your password manager and authenticator app.
- Test WhatsApp and other essential messaging apps.
- Open your banking apps and complete any activation steps.
- Make a test call and send a message.
- Confirm that mobile data and Wi-Fi are working.
- Check that your SIM or eSIM is active.
- Open important documents and downloaded files.
- Make sure your photos and other important information have finished synchronizing.
Some downloads and cloud services may continue working in the background after setup. Give them time to finish and investigate any missing information before taking further action.
When Is It Safe to Erase Your Old Phone?
Only erase your old phone after checking the information you need on the new device and confirming that your backups are accessible.
Pay particular attention to authentication apps, message histories, locally stored photos, notes, downloaded documents, and applications that require a specific migration process.
Once you are satisfied, sign out of accounts or remove device associations as appropriate, then use the phone’s built-in factory-reset procedure. If you are selling or giving away the device, follow the manufacturer’s instructions for preparing it for another owner.
Factory resets permanently erase local data, so avoid resetting your old phone while you are still checking the migration results.
Final Thoughts
Moving everything from an old phone to a new one can seem intimidating, but it rarely needs to happen all at once. Begin with a backup, use the migration tools provided by your devices, and pay particular attention to applications that store information separately from the phone’s main backup.
A compatible data cable can simplify some transfers, while an external SSD can provide an extra copy of important files. Neither is essential for every phone migration.
The most important step is the final inspection. Confirm that your photos, messages, passwords, authentication tools, and mobile service are working before erasing your old device.
A little extra time spent checking can save you from discovering that an important file or conversation was lost after the old phone was wiped.
Amazon Affiliate Disclosure: As an Amazon Associate, I earn from qualifying purchases.